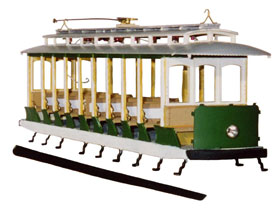
This is the model to date, still in progress. Still requires trucks, motors and interior work.
This is the unused portion of the open car.
Boston Elevated, 12 Bench, Open Car
Concept
A turn of the century (the other one) double truck open bench car.
Products used:
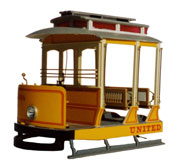
Bachmann Open Cars - 2 each
LRP #004 Trolley Base + Pole kit
Disassembly
Separate the roofs by gently pulling outwards on each side of the letterboards. There are several clips along the inner letterboard edge, that clip into the body to hold on the car roof. Carefully pry or pull apart by hand the upper edges of this letter board, and as you do, it should seem like the roof is now separating from the main car body. Carefully lit up on the roof section. There are some wires, but they should separate by themselves, as they have clips and sliding parts.
Remove that plastic structure (bumper?) where the coupler is under or in front of the dashes.
Next, carefully cut, as straight as you can, across the floor and the letterboard. Once these have been cut, basically each in half, splice them together.
Decide how long your open car will be. A 12 bench car, 14 bench car were the standard lengths, but this being a hobby, go for it, Make a stretch Open car !! Getting back to the project at hand… Splicing these bodies together is not quite as difficult as it might seem. Getting the roof to line up is a bit trickier. Be very patient. Make many, many test fits before you begin to glue either the bodies or the roof together. This includes getting the upper clerestory windows to look OK.
Once you have the roof spliced together and it fits onto the car body shell nicely (well, as best as one can!), then splice the trolley boards together. As you can see from the model, the upper windows are not yet in. If you can, make a few of the clips line up. You will probably only need a few, and you’ll be handling this model, so you’ll know it’s weak points.
Cut off four of the first inner seat castings off the car shells that are surplus. (This is the seat right behind the bulkhead with the three windows). These were added to the fronts of the car. The seat back and bottom were taken from the surplus ends and added to this car. Now you have a front seat at each end!
Some styrene (wood strips) were added across the backs of all the bench seats.
The front dash area has also been modified to simulate a larger bumper on this car. The old running board was cut off (leaving behind the old brackets) and fabricated new running boards (left + right side) to be applied later on.
© Light Rail Products